
Best Practices for Spaces Upgrades
This document outlines best practices for updating your Spaces plugin to a new version
Upgrade Steps
Note: These steps assume that a previous version of Spaces has already been installed on the site. If this is not the case, then follow the installation instructions onthis page.
Upload the Plugin
For external clients, it is customary to install and upgrade Spaces through the WordPress plugin interface.
-
Navigate to the website’s WordPress CMS admin dashboard and log in.
-
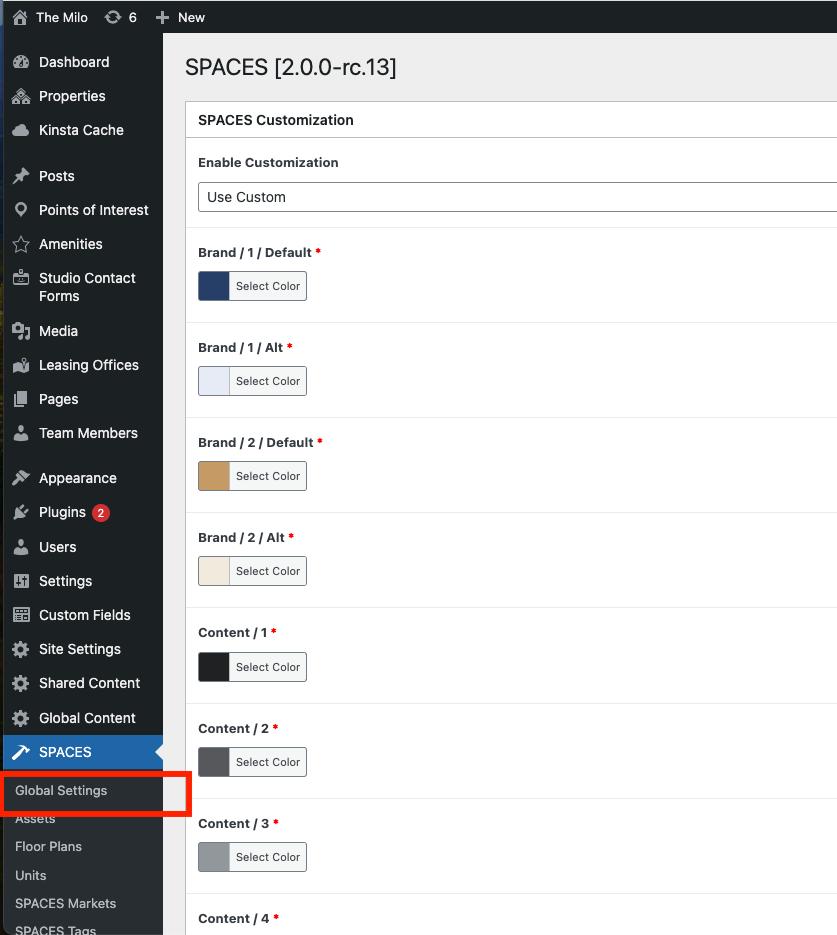
Check which version of Spaces is being replaced by navigating to the Spaces global settings page. The simplest upgrade procedure will be for versions marked "RC.XX", where XX is some version number. Certain older installations may be running earlier "Beta" versions that require a few extra steps.
- If the version name includes "Beta," then the Engrain plugin may have to be removed before the upgrade. (See below.)
- If custom colors are selected, check that there are more than three color fields. If there are only three color fields, then you will have to select a new set of custom colors after the upgrade is complete, or have a designer do it for you.
-
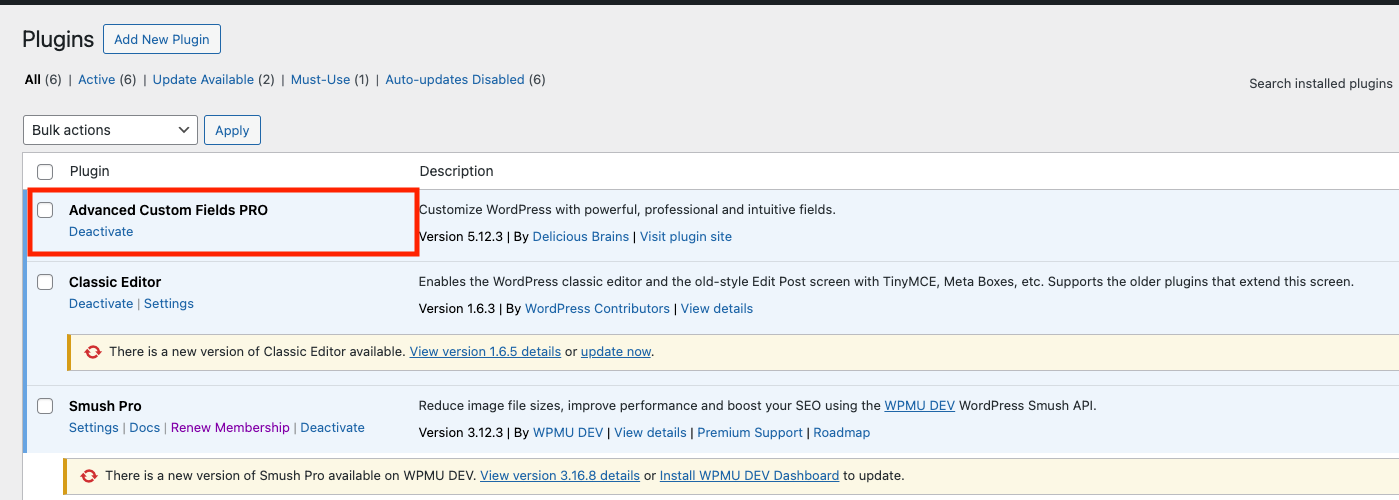
Navigate to Plugins > Installed Plugins, and check for the following:
- Advanced Custom Fields ("ACF") should be installed, and activated, and at least version 6.
-
- If a plugin named "Engrain" is present, this must be removed before upgrading Spaces, as the newer versions subsume the Engrain plugin's functionality. At this time, deactivate the old Spaces version, then deactivate and remove the Engrain plugin.
- Advanced Custom Fields ("ACF") should be installed, and activated, and at least version 6.
-
If your ACF version is lower than the required minimum, request the latest spaces-package.zip from your implementation specialist. Extract the ZIP file to obtain:
- advanced-custom-fields-pro
- ecs-spaces
-
Add upgraded plugins using the procedure below. Upgrade ACF first (if necessary), then Spaces itself. The steps are as follows, with images for the Spaces upgrade:
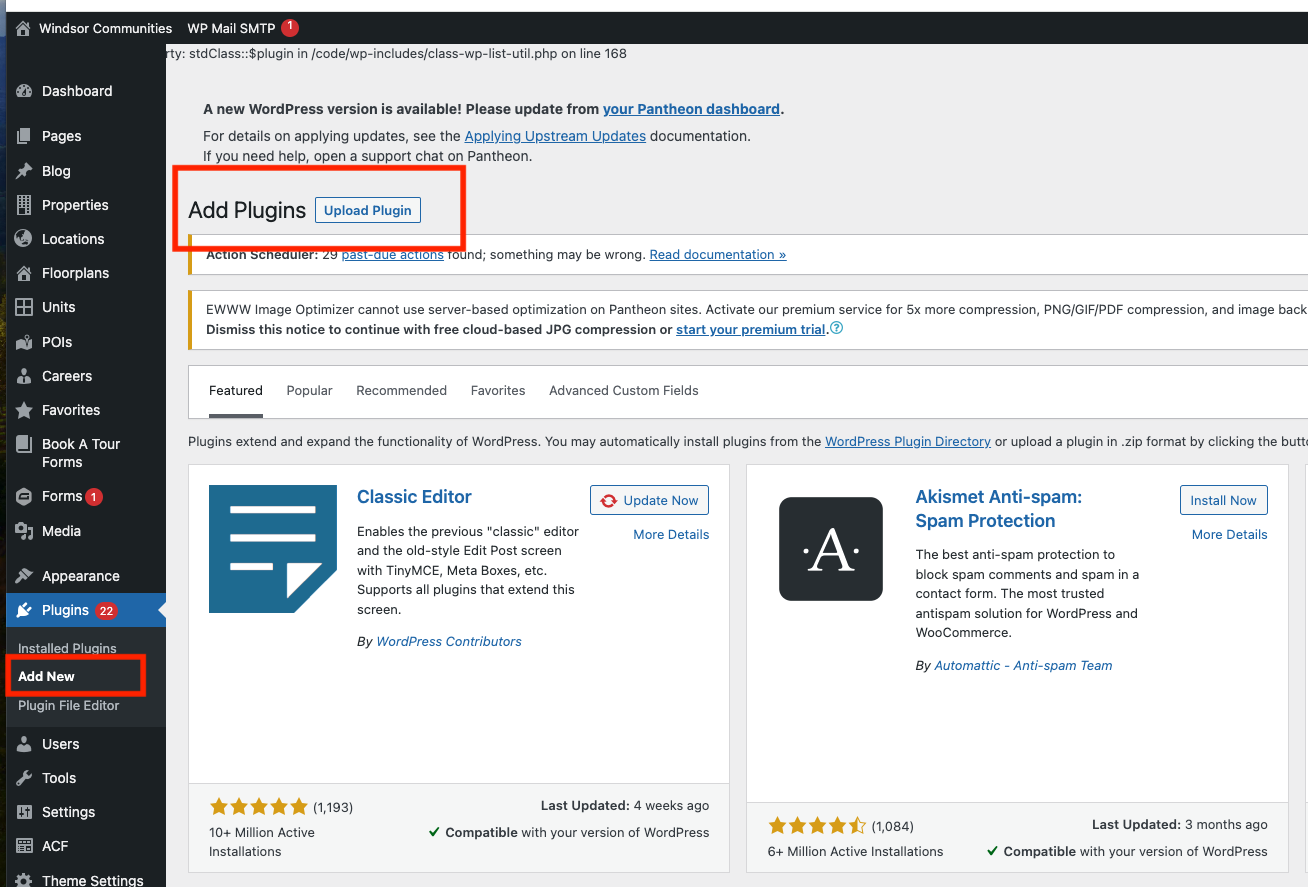
- Navigate to Plugins > Add New, then click on the Upload Plugin button. A button marked "Choose File" will appear. Click on it to open a file selection dialog, allowing you to select a compressed plugin file for importation.
-
- Navigate to the ZIP archive of the plugin you wish to install (ACF or Spaces), and select it. Once you do, the file name will be displayed next to the "Choose File" button. Click "Install Now" when ready.
-
- Wordpress will attempt to install the plugin. If you are uploading an updated version of a plugin that already exists, it will present you with a screen showing the two different versions, and giving you the option to replace the existing version of the plugin with the new one, or to cancel the installation of the new files. Click "Replace current with uploaded" to proceed.
-
- Once the installation is complete, activate the plugin.
- Navigate to Plugins > Add New, then click on the Upload Plugin button. A button marked "Choose File" will appear. Click on it to open a file selection dialog, allowing you to select a compressed plugin file for importation.
-
Once the procedure in Step 5 has been completed, you can proceed to the next phase of the upgrade. If any unexpected problems occurred, contact a dev for assistance.


It is recommended to first test any updates for plugins, themes, and WordPress on a staging version of your site before applying them to the live production site, if possible. Additionally, ensure you create a backup that can be restored before updating any plugin or theme.
Update Global Settings
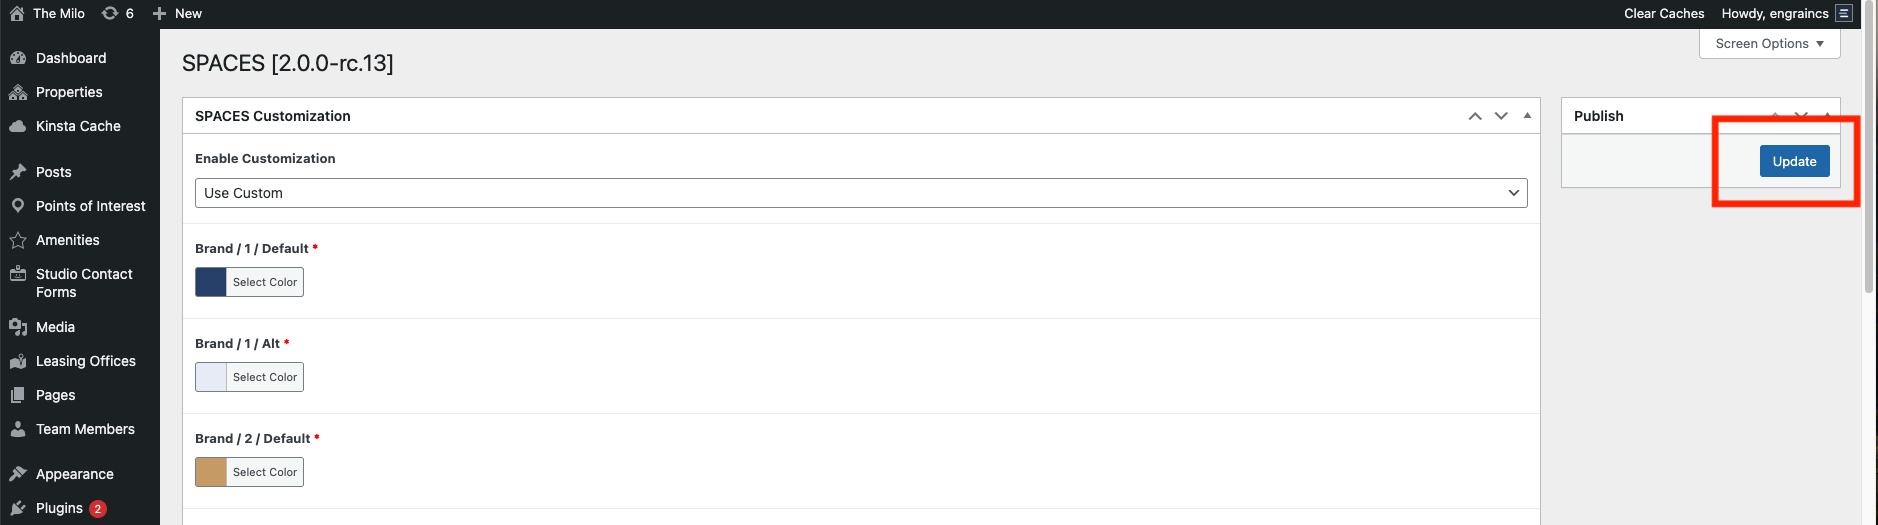
- After the installation is confirmed, navigate to the Global Settings page under the Spaces menu items. (Clicking on the top level Spaces menu item will generally suffice.)
-
- Click the Update button to refresh styles and initialize any new fields.
-
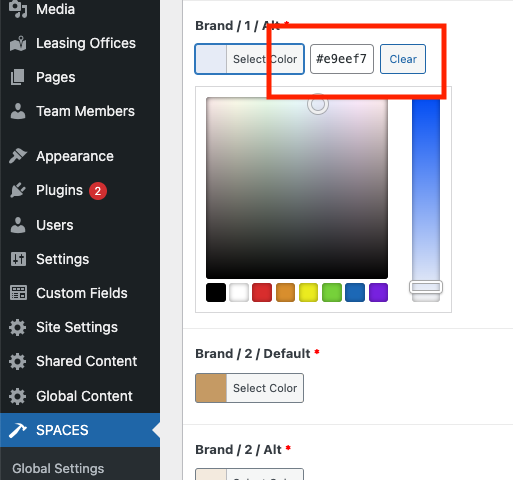
- As noted in Step 3, Section III of the plugin update procedure above, some older sites may have been using very old versions of Spaces that only allowed three custom colors. When upgrading to more advanced versions with more custom color options, it will be necessary for the user to switch to the default color scheme, or to select new custom colors. If unsure which colors to use, contact a designer for assistance.
Import SightMap Data
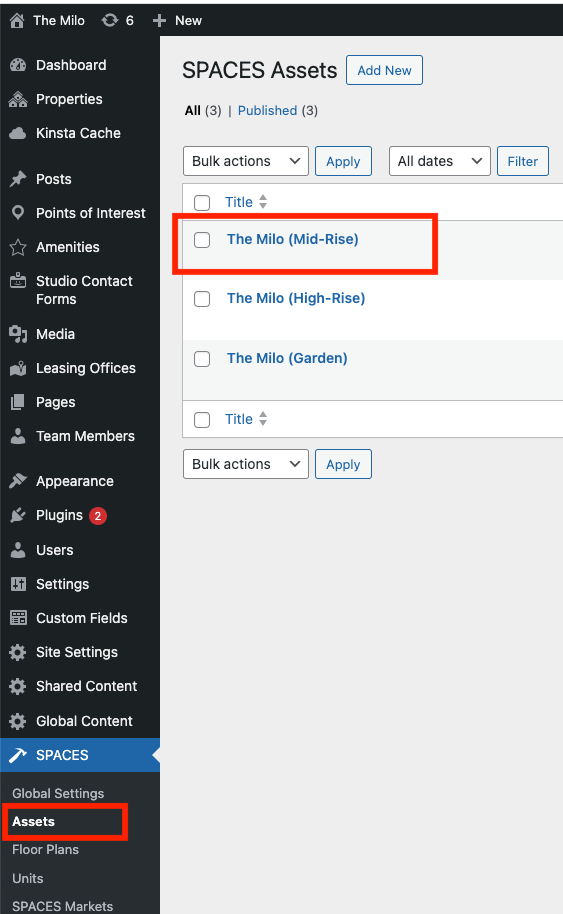
- Go to Spaces > Assets, and click on the name of the asset in the index to view its details.
-
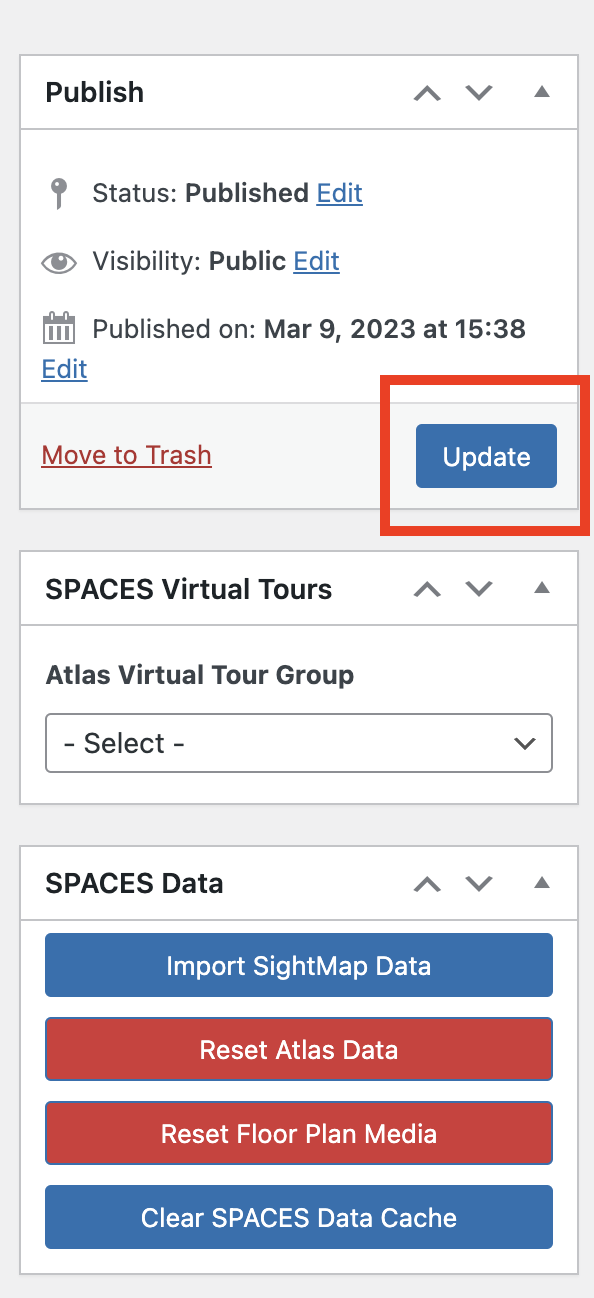
- Click the Update button once. Wait for the page to refresh.
-
- Click the Clear Spaces Data Cache button. A notification banner will appear at the top of the page when the process is complete.
- Select Import SightMap Data. The entire import process should take approximately five minutes, depending on the number of floor plans and units.
-
- An email will be sent to the site administrator once the process is complete.
- If you have multiple Spaces Assets, repeat steps 1-4 for each one.

At this stage, your Spaces should be successfully upgraded to the latest version.
Common Issues and Resolutions
Color Selections and CSS Issues:
If the front-end of your site does not appear as expected, double-check the customization values entered in the CMS. Ensure that each color code begins with a # symbol (e.g., #ffffff for white).
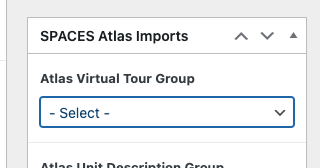
Virtual Tour Issues
If you are unable to select a Virtual Tour Group or Unit Description Group, please contact support to request that this feature be enabled for your account.
Updated 8 months ago