
Adding Additional Single Property Instances in Spaces
This document provides detailed instructions for adding additional single property instances in Spaces
NoticeThese instructions assume that the user has already added a valid API key under the Spaces > SightMap API page. If you have not already done so, consult step one of the setup instructions on this page.
Note you don’t have to have a SightMap embed if your SightMap isn’t finished. Spaces will be limited to the unit and floor plan views, and the map embed can be added later.
Steps for adding additional properties in Spaces
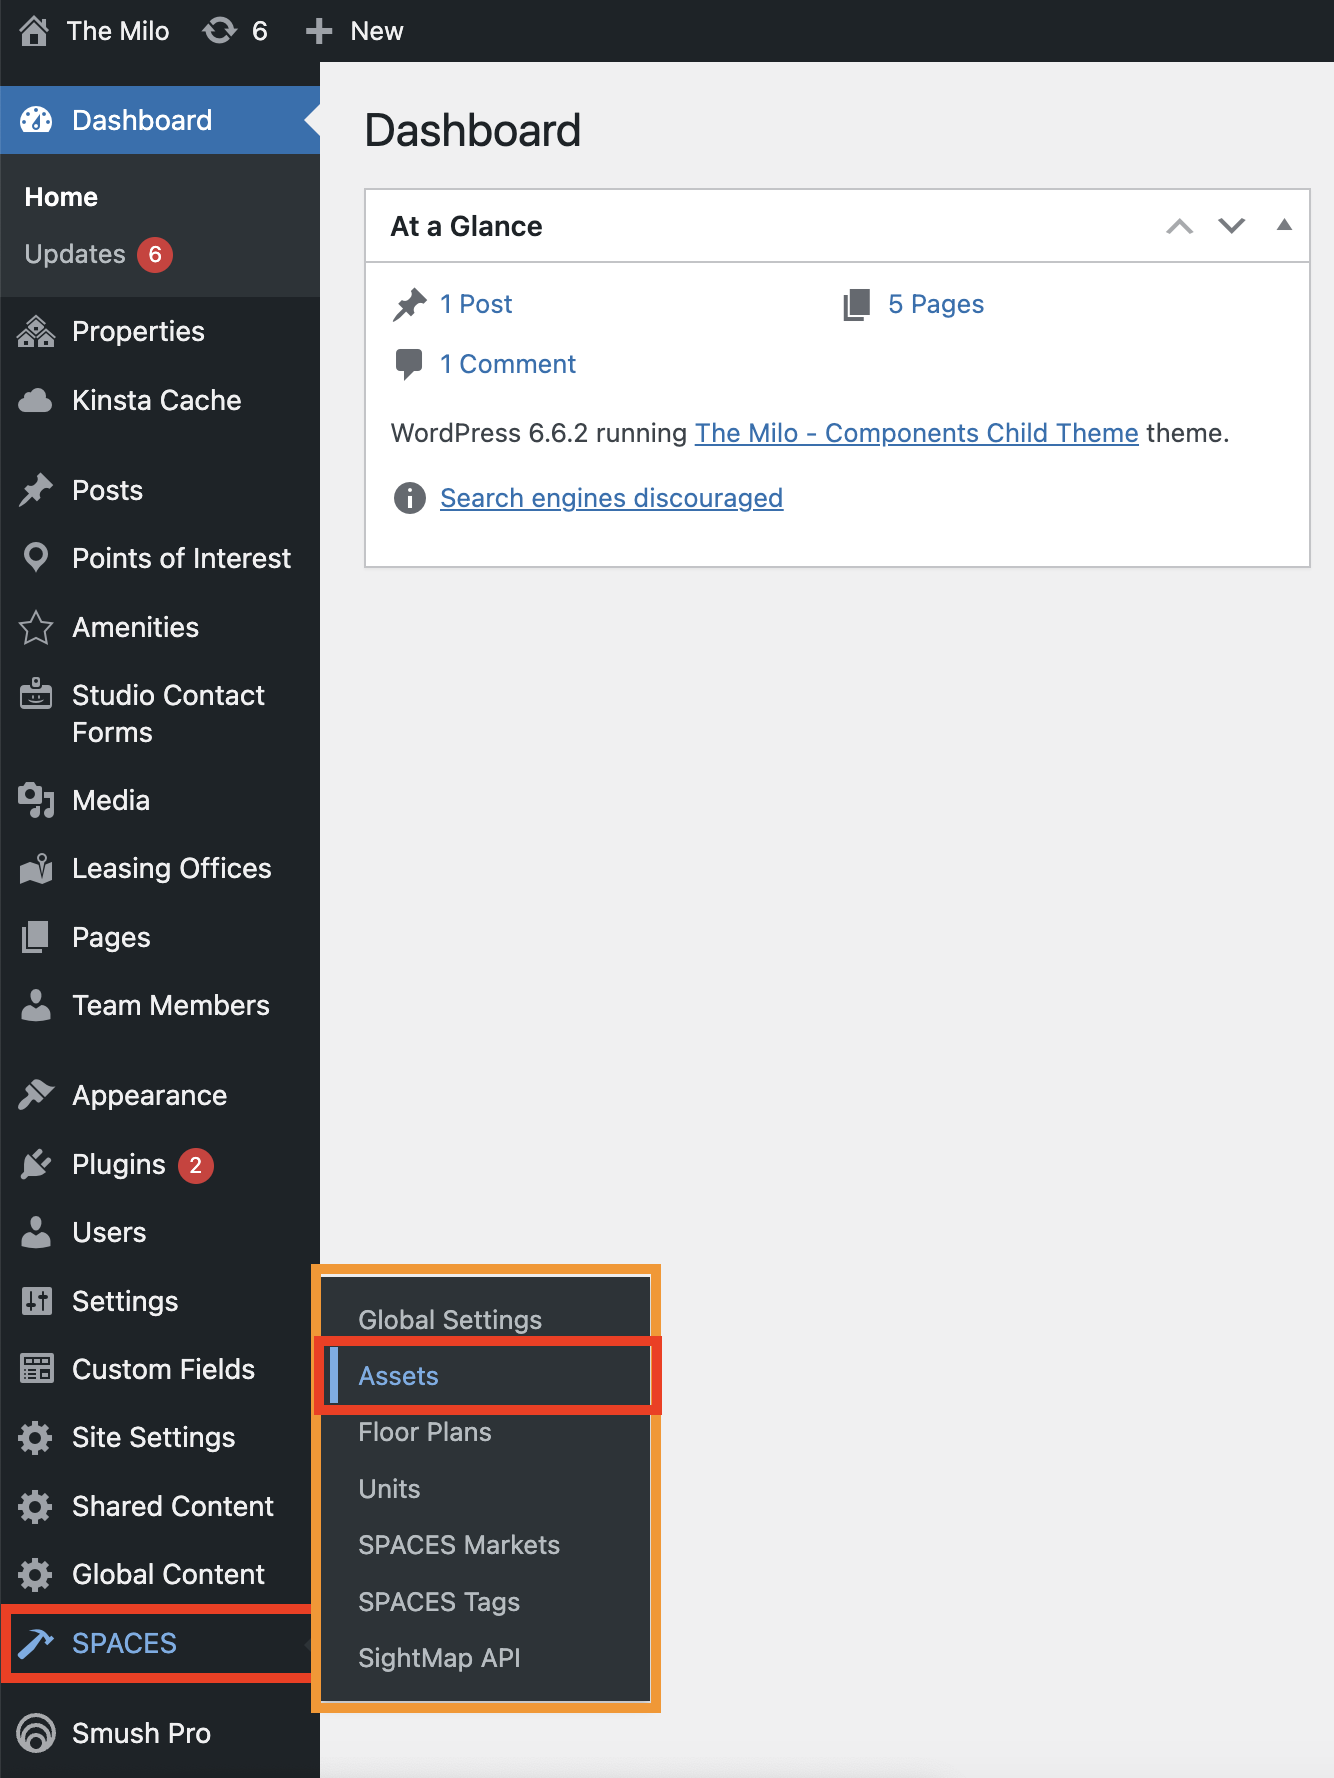
- Navigate to Spaces > Assets in the Wordpress CMS. (Relevant options outlined in red and orange in the screenshot below.)
-
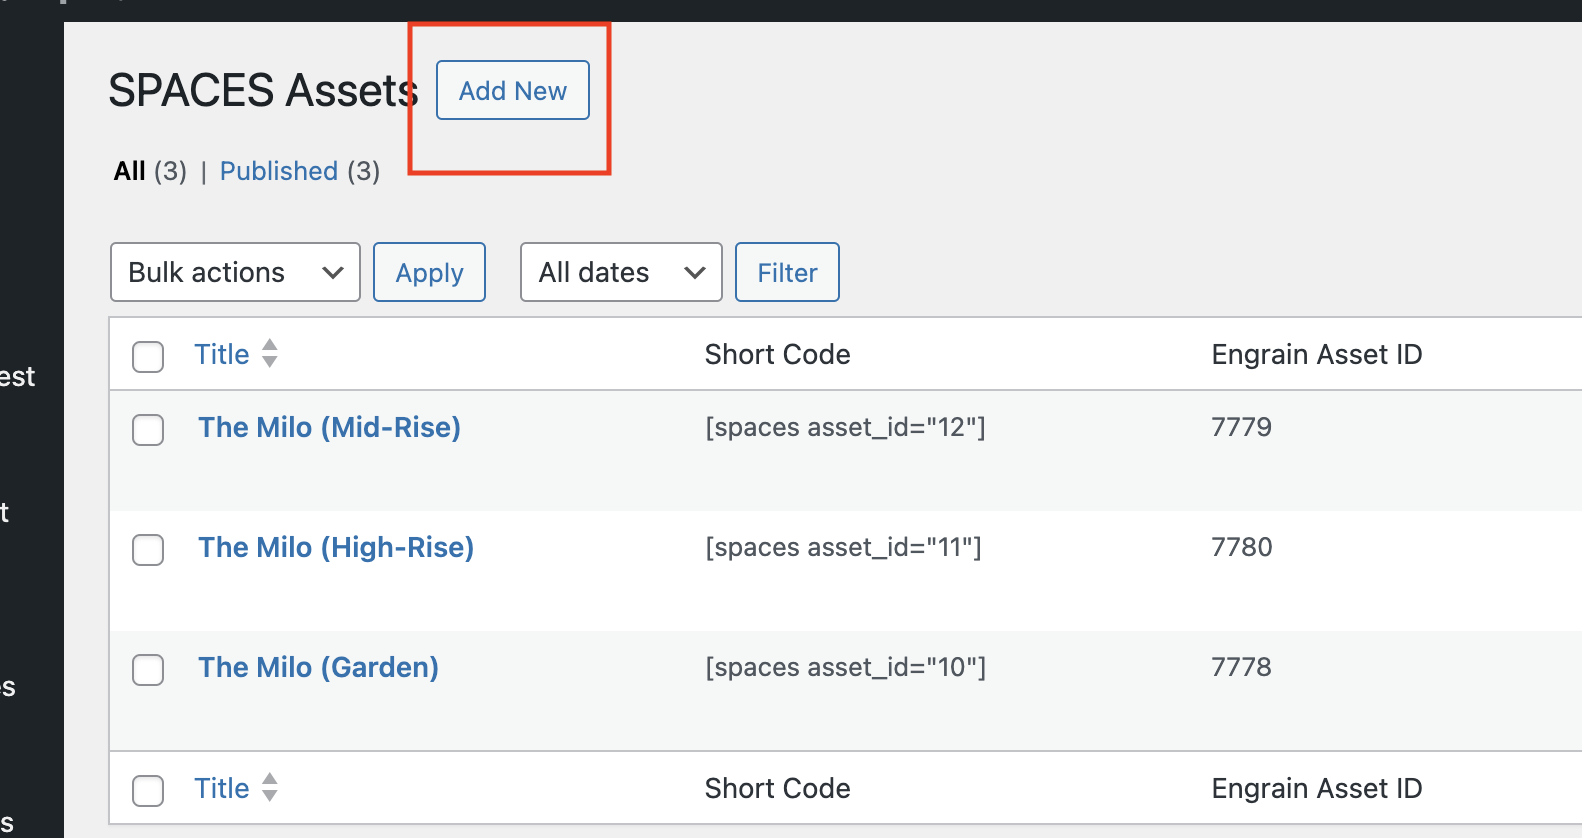
- Click the "Add New" button to create a new Spaces property asset.
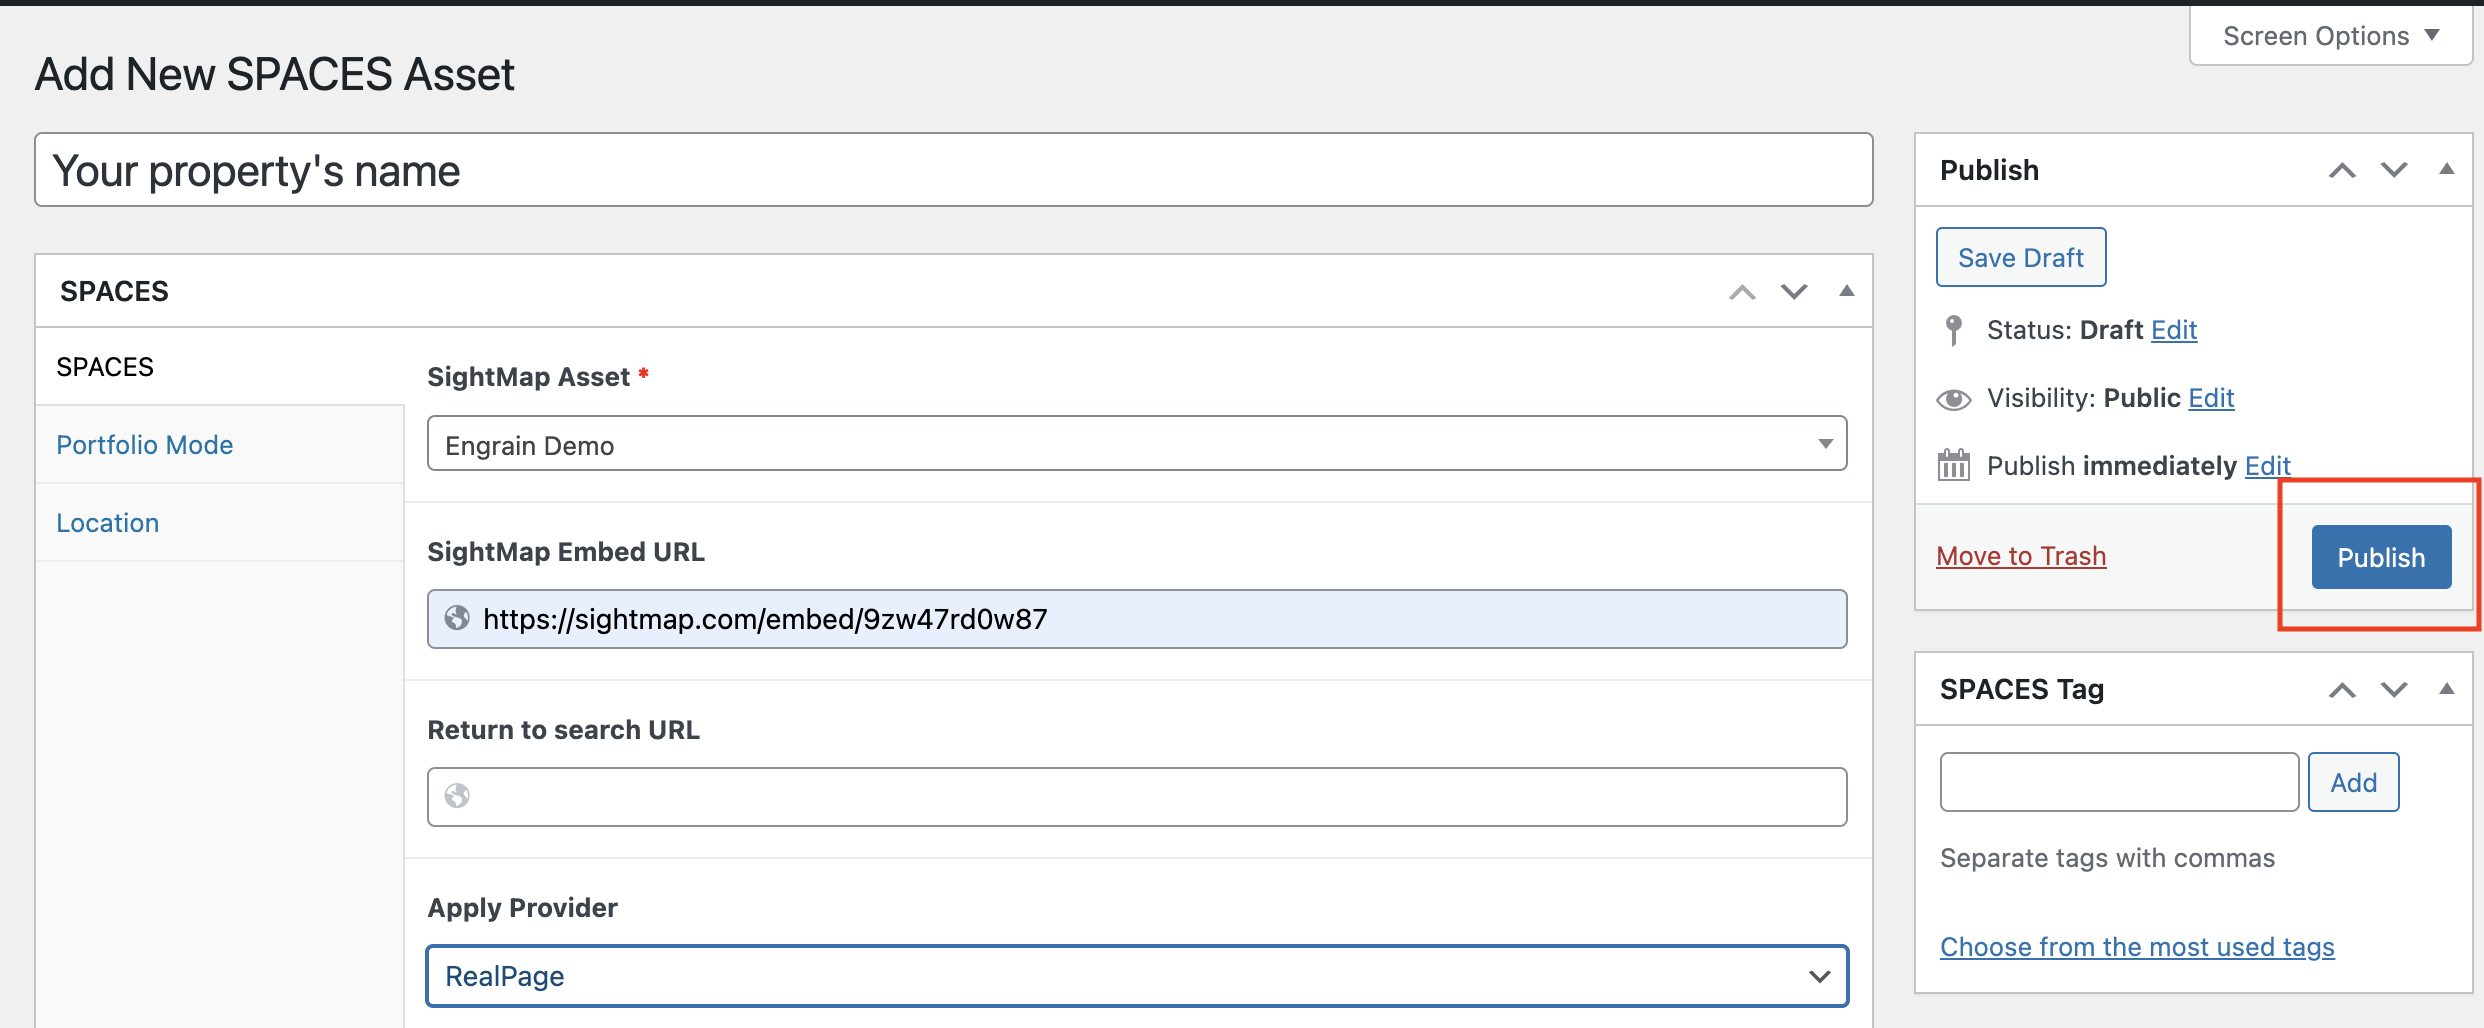
- Enter your property's information:

- Title: Enter the name of your property.
- SightMap Asset: Select the property in question from the available options in the dropdown menu. If the property in question is not listed, contact Engrain Support for assistance.
-
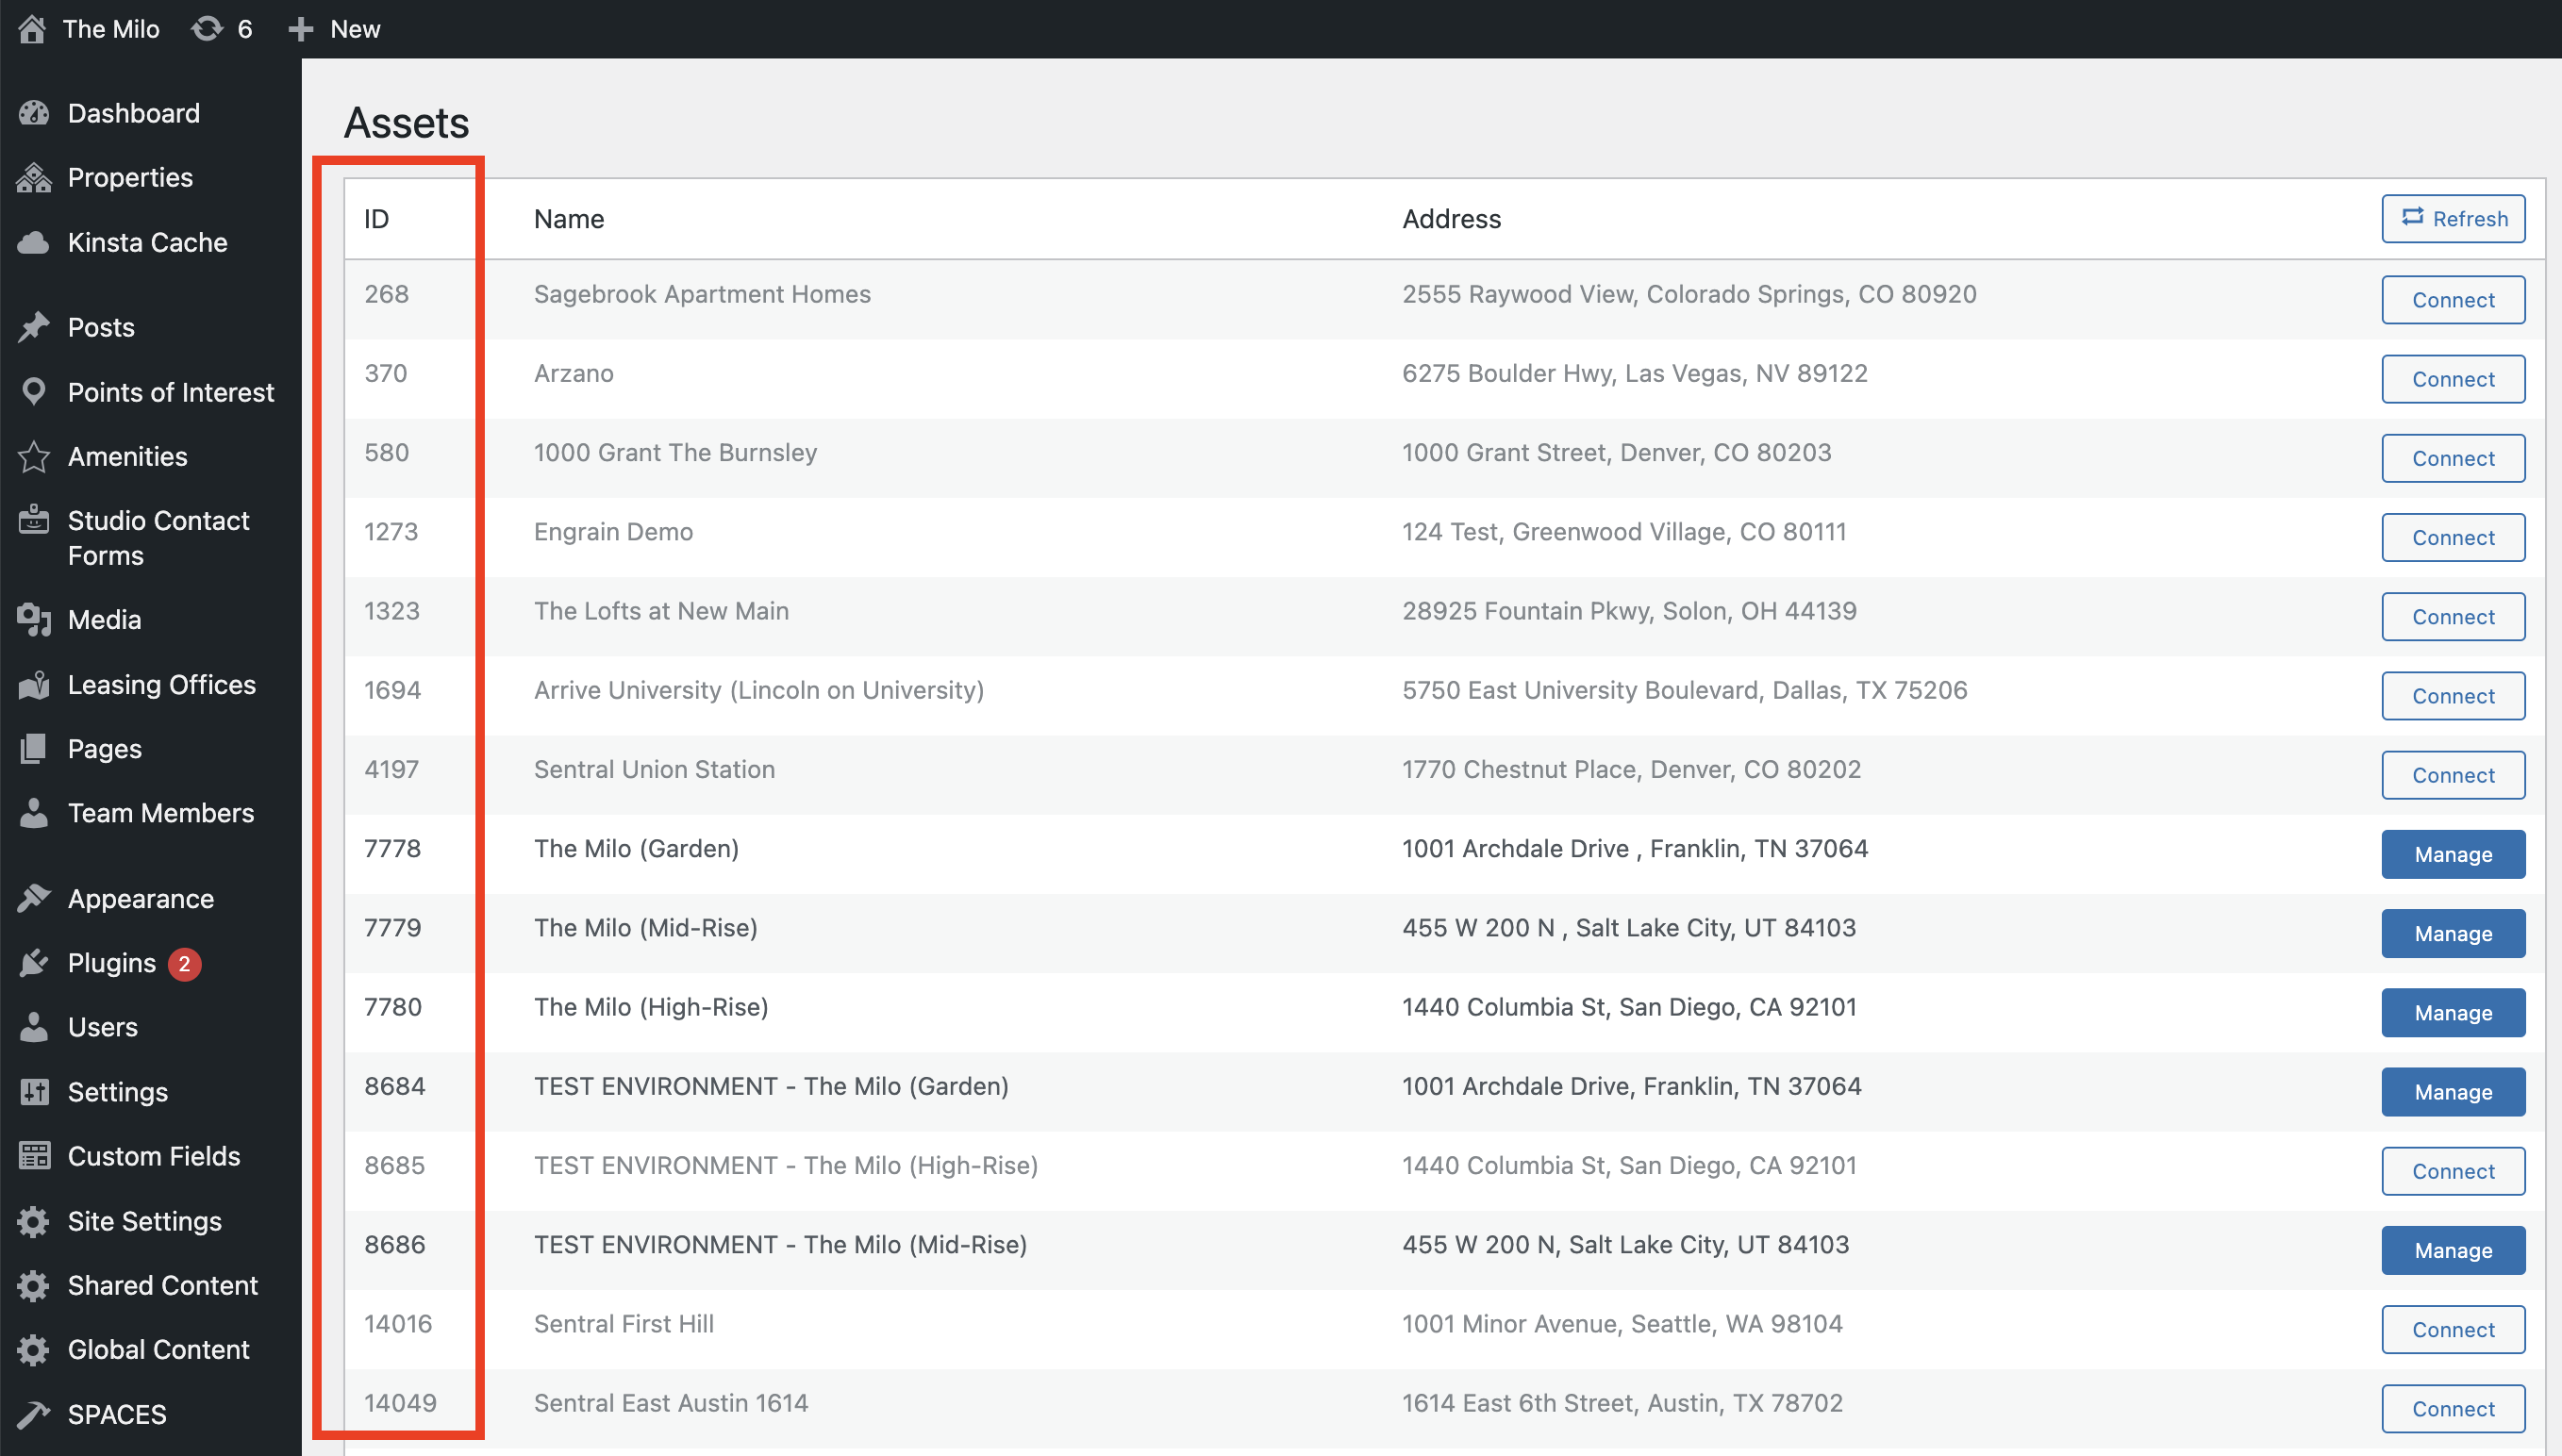
Caveat
On certain older versions of Spaces, this field will be listed as SightMap Asset ID, and require a numerical ID value. The Engrain Implementation Team should have supplied the ID number in such cases, but it can also be obtained by examining the ID column of the property list on the Spaces > SightMap API page; see the screenshot below.
-
-
- SightMap Embed URL (If applicable) : Provided by the Engrain Implementation Team.
- Apply Provider: Select your online leasing provider from the dropdown. Some additional fields may appear depending upon your selection.
- Revenue Management: Check the box if available.
- Select "Publish" to create your asset. Wait for the page to refresh.
- Click the "Import SightMap Data" button to import your property's floor plan and unit data. The plugin will retrieve the data from SightMap and automatically create records for each floor plan and unit. Spaces will send an email to the website's administrator when the import is complete.

The above should suffice for setting up a Spaces Asset for most properties. Additional configuration may be undertaken at this time, if necessary.
Important Considerations:
- Ensure you have received the necessary materials (spaces-package.zip, SightMap API key, SightMap Embed URL, SightMap Asset ID, and any applicable pricing & availability settings) from your Engrain Implementation Specialist before starting.
- The Spaces plugin requires a pricing & availability process configured in Engrain's systems to successfully connect the property.
- After importing data, check the Pricing & Availability, Units, and Floor Plans tabs to confirm data is correctly populated. If there are errors, use the "Import Now" button or contact your Implementation Specialist.
- Note: If the user has only just triggered the import, the process may take a few minutes, especially when importing a large amount of data.
- Under the Spaces Asset settings (usually at the bottom), the field Spaces Customization > Enable Customization allows the user to choose whether to use the custom colors entered under Spaces > Global Settings (if any), or to choose another set entirely for a particular Spaces Asset. This field is set to "Use Global" by default, and for most applications, this is recommended. Set this field to "Use Custom" only if you are certain that a particular asset requires different colors.
Updated 8 months ago